![theorem-technologies-logo.png]](https://theorem.io/hs-fs/hubfs/branding/theorem-technologies-logo.png?height=40&name=theorem-technologies-logo.png)
About
The Allocation Explorer is a sandbox environment that is not connected to any production data that allows you to enter a theoretical set of shareholders that have a fractional share, enter theoretical fill prices, and then see the results of using Theorem's allocation splitting tool.
The incoming position and price for each shareholder is optional, but when provided and used when the "Use Incoming Position" toggle is on will also demonstrate how the allocation engine corrects both fill quantities and trade prices to keep all shareholders as balanced as possible.
Sandbox Limitations
We use monikers in the allocation explorer to prevent using PII or production data.
An Alias is a moniker for what would be an account or shareholder.
An Symbol (symbol 1 or symbol 2) is a specific security, such as front month E-Mini S&Ps. The explorer supports up to two symbols at a time without specifically naming the symbols.
Share Box
This area controls our shareholder information prior to allocation.
The share table
Set up your share / allocation percentages in the share box. Each row in this box is meant to be an alias for an account or shareholder. Each alias has a share percentage, and optionally an existing position and VWAP of the position for up to two symbols.

Click + Add row to add a new Alias. The new row will appear at the bottom of the share box; you may need to scroll down. To remove an alias, click it's row checkbox and click the Delete selected button.
Double Click any cell to change the alias name, share percentage, starting position, or starting price.
Starting position and price are optional. If used along with the Use Incoming feature, the allocation engine will examine the existing position and price to allocate.
Shares Must be 100%
The total share percentage of all aliases (all rows) must be exactly 100%. The UI will alert you if you are over or under 100% and not allow allocations. If you are under 100%, use the Auto Rebalance toggle to modify every quantity up so that the total equals 100%.
Fill Box
This is the area on the lower left of the tool that allows you to create theoretical fills for up to two theoretical symbols. Each fill has it's own quantity and price and when the allocation button is pressed all of the fills in this box are allocated together.
Fill Table
The table in the fill box has one row per fill with it's own quantity, price, time, and symbol.
Double Click into any cell to change the quantity, price, time, or symbol value. Press the enter or tab key to finish the change.
Adding More Fills
Click the +Add row button to manually add one or more fills. After the row is added, double click the quantity cell, enter a quantity, press tab (or click on the price column) to enter the fill price.
The Generate Fills button will randomly generate more fills with quantities and trade prices that are near other fills that have already been entered in the fill box.
To delete one or more fills, click the checkbox in the rows you want to delete and click the Delete sected button.
Verify Your Fills
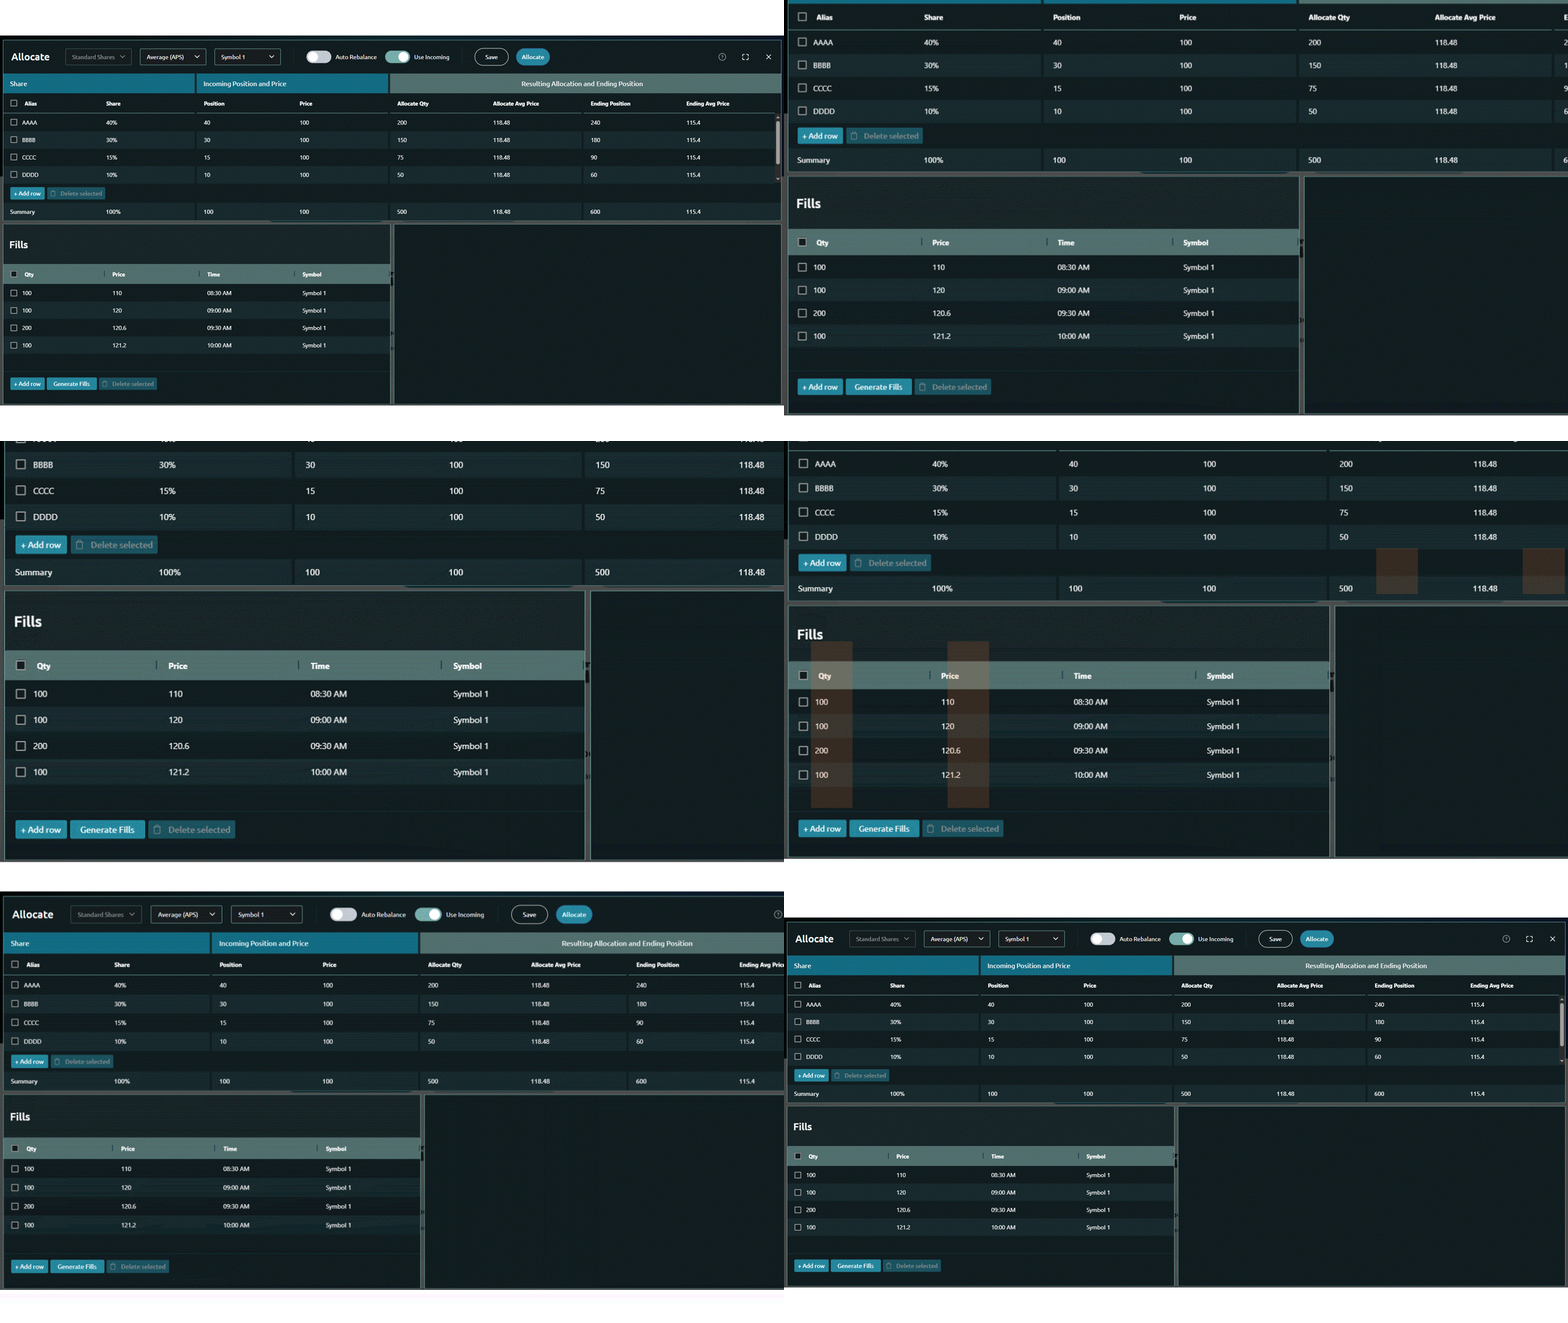 The total quantity and VWAP of all the fills in the fill box will always match the summary quantity and trade price that is in the bottom row of the Allocation results box.
Allocation Settings
Use the allocation settings on the top row of the Allocation Explorer to control how the UI works and how the allocation engine generates results.
Share Presets List Box
Use share presets to save multiple sets of aliases and share percentages and then load them when required later.
To create a new preset, click Create New... from the list box and give the preset a name. That name will be saved according to the alias and share list currently in the Allocation Explorer.
To load an existing preset, just select it from the list.
Presets are only available to users with commercial Theorem accounts, but clicking the Save button allows you to save the current work.
Allocation Method
Dive Deeper
See Trade Price Allocation Methods for more detailed information on the differences between trade price allocation methods including some simple examples.
Use this list box to direct the allocation engine how to allocate trade prices at allocation time. Switch between:
- Average (APS) for volume weight average price (VWAP). All trades will always receive the same price.
- Low to High and High to Low to sequentially assign prices based on sorted alias.
- Best Fit Linear / Heuristic to chose a combination of trades that achieve the optimal allocation based on shares and incoming position.
Select Symbol
Instead of using a specific security such as front month E-Mini S&P futures, the Allocation Explorer uses generic "symbol 1" and "symbol 2" to help evaluate the allocations while keeping all actual data agnostic.
Switch between the two symbols using the list box on the top of the explorer. If you choose both symbols, the allocation engine will allocate everything at once but you can only view the results one at a time.
Auto Rebalance
This toggle is a UI tool only that forces all shares to always be 100% at all times. When Auto Rebalance is turned on, any change to the share percentages that does not result in an allocation of 100% will automatically adjust all other alias values proportionally to make up the difference.
Tip: Use Auto Rebalance to Simulate a Redemption
Turn auto rebalance on, click an existing alias' checkbox, and click Delete selected. All of the remaining share percentages will proportionally adjust to make the total 100%
Use Incoming
This feature instructs the allocation engine to consider each alias' existing position and price when making allocation decisions. When enabled:
- The Allocated Quantity will be optimized so that the Ending Position is as close to the share percent as possible. This could even result in some alias receiving zero or all fills.
- The Allocated Trade Price, only if using Best Fit, will be optimized so that the Ending Avg Price is as close to the total average as possible, not just the average of the fills.
When Use Incoming is turned off, the allocation quantities and trade prices are "blind" in that the allocations are optimized to the total fills, not the ending quantities.
Save Button
Press Save to save everything in the allocation explorer to your user's settings. On your next visit, you can continue where you left off. Just remember to click the Continue button before you activate the Allocation Explorer on your next visit.
Allocate Button
If you've made any changes in the share box, fill box, or to allocation settings, the window will alert you with a bubble that appears under the Allocate button.
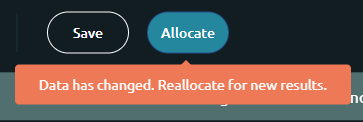
To make the changes you've entered update the allocation results, press the Allocate button.
Allocation Results
After pressing the Allocate button, a summary of the results will appear. in the results box on the upper right corner of the Allocation Explorer.
Allocated Quantity and Allocated Price
- Allocated Quantity is the total quantity each alias has been allocated.
- Allocated Price is the VWAP each alias has been allocated.
Each line represents a total. The Allocation explorer does not provide the details on every individual allocation.
Ending Position and Ending Avg Price
The last two columns represent what the new position and VWAP will be after
- Taking the incoming position and it's VWAP, even if Use Incoming is Off, and adding that to
- The allocated quantity and VWAP.
How Use Incoming Impacts the Allocation
When allocating quantity:
- Use Incoming = OFF allocates to the Allocate Quantity
- Use Incoming = ON allocates to the Ending Position
When allocating trade price:
- Use Incoming = OFF allocates to the Allocate Quantity
- Using APS has no effect because the allocated price will always be the fill VWAP.
- Using Low to High or High to Low has no effect because the allocated prices always follow the same sort other.
- Use Incoming = ON with best fit allocates to the Ending Avg Price